A successful LiDAR project doesn’t start in the air. It starts long before the aircraft or drone ever takes off, with planning. The truth is most data quality issues, unexpected delays, and budget overruns can be traced back to the same root cause: teams rushing into acquisition without aligning on the technical requirements, regulatory constraints, or deliverables.
And the impact is real. Industry surveys show that up to 42 percent of LiDAR project delays stem from overlooked permitting and coordination issues, while 25 to 30 percent of reprocessing costs are caused by incorrect datums and projection choices set at the start.
When you invest in LiDAR, whether for flood modelling, transportation design, environmental assessment, utilities, or forestry, your downstream decisions are only as good as the data you collect. That makes preparation the most important phase of your project.
This guide walks consultants, planners, engineers, and project managers through the six essentials you should confirm before launch: permits, timelines, coordinate systems, accuracy targets, deliverables, and budget expectations. Each step includes practical insights, industry benchmarks, and real-world tips to help you avoid delays and set your project up for success.
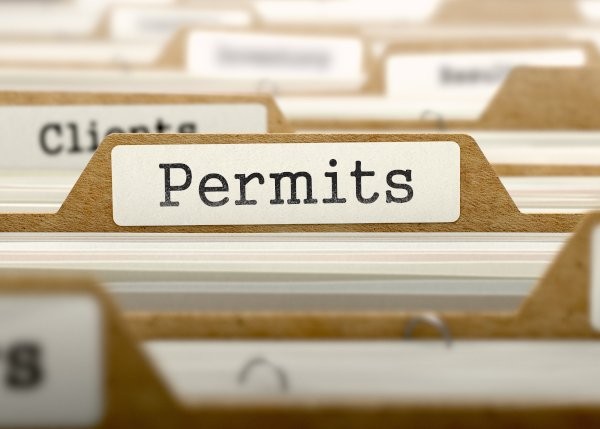
1. Confirm Permits, Airspace Rules, and Regulatory Requirements
Why Permits Matter More Than Most Teams Expect
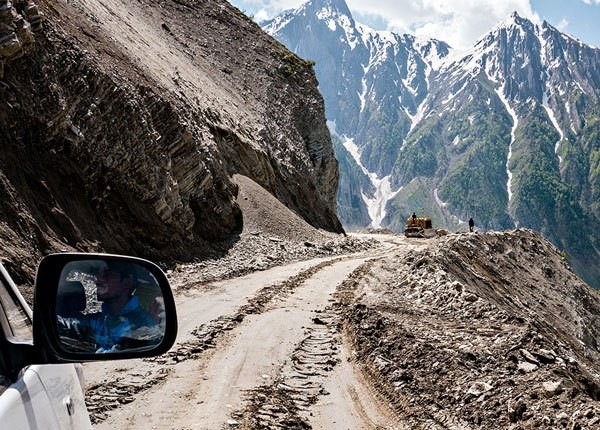
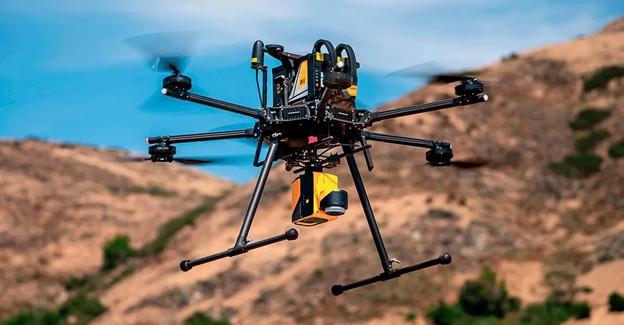
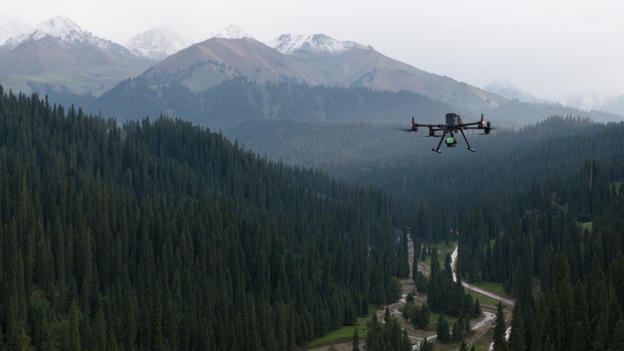
Before any aircraft or UAV can fly a LiDAR mission, your team needs to secure approvals. This is where most project delays begin. Permits are often underestimated, misunderstood, or submitted too late, leading to avoidable rescheduling and cost increases.
Across Canada, aerial LiDAR collection may require coordination with:
- Transport Canada for UAV SFOC approvals
- Nav Canada for NOTAM filings and controlled airspace considerations
- Local municipalities for low-altitude or urban operations
- BC Parks or Parks Canada for protected areas
- Wildlife management agencies if surveys overlap with nesting or migration windows
Regulatory and permitting issues are consistently cited as one of the biggest challenges for drone and aerial survey operations worldwide. Recent global drone industry surveys note that regulatory obstacles remain the top challenge for operators, ahead of technology and even client acquisition.
In Canada, work in protected areas adds another layer of timing risk. Parks Canada strictly limits drone use and requires formal permits for research or operational work, and some research and collection permits advise applicants to plan for review periods of up to 90 days in certain national parks.
For project managers, the takeaway is simple: if your LiDAR acquisition overlaps with national or provincial parks, you should treat permitting as a critical path item and build those timelines into your schedule from day one.
If your project is near highways, transmission lines, airports, heliports, or border zones, you may need additional clearance.
Permitting Timelines You Should Expect
Here is a realistic planning window to build into your timeline:
- Transport Canada SFOC for UAV LiDAR
10 to 20 business days - Municipal + local approvals
1 to 4 weeks - BC Parks or Parks Canada permits
6 to 12 weeks depending on ecological sensitivity - NOTAM filings
24 to 48 hours - Wildlife restrictions (including nesting windows)
Seasonal, often March through July for sensitive species
If your project must be completed within a tight timeline, early permitting is the single biggest factor in avoiding delays.

2. Set Realistic Timelines Around Weather, Season, and Leaf Conditions
Weather and Seasonality Can Make or Break Data Quality
Even the best LiDAR sensor cannot overcome poor collection conditions. Weather, cloud cover, vegetation state, and environmental factors directly affect point density, ground penetration, and ultimately the accuracy of your deliverables.
This is why experienced project managers never lock dates until they understand the seasonal constraints of their region.
Key Seasonal Considerations
- Leaf-off conditions (late fall to early spring) are ideal for:
- Bare-earth elevation modelsHydrology and flood modelling
- Urban infrastructure mapping
- Leaf-on conditions (late spring through summer) are essential for:
- Forestry canopy assessmentsBiomass and carbon modelling
- Vegetation classification
- Snow cover prevents LiDAR from accurately reaching bare earth, creating false elevations and 10 to 20 centimetres of vertical error.
- Bathymetric LiDAR requires:
- Secchi depth greater than 1.5 metresLow turbidity
- Calm water conditions
Weather Impacts You Must Plan For
- Cloud cover above 30 percent reduces point density.
- High winds create flight instability and sensor vibration.
- Rain and post-storm moisture create reflective surfaces and pooling errors.
- Coastal fog can ground flights for days at a time.
Recommended Timeline Buffer
Most LiDAR vendors advise building a 20 to 30 percent weather buffer into your acquisition schedule. For projects over 500 km² or those requiring high-density scans, weather windows may need to span 4 to 12 weeks.
Checklist: Prepare Your Timeline
- Season aligns with your intended analysis
- Minimum weather buffer added
- Flexible acquisition window set
- Avoided periods immediately after storm events
- Bathymetric clarity verified (if applicable)
Pro Tips
- For flood modelling, schedule flights 48–72 hours after rainfall to reduce temporary pooling.
- For forested areas, early spring provides some canopy penetration without snow coverage.
- Always ask your LiDAR vendor for their historical weather delay data for your region.
3. Lock in Coordinate Systems, Datums, and Projections Before Acquisition
Most Expensive LiDAR Mistakes Start With Incorrect Coordinate Choices
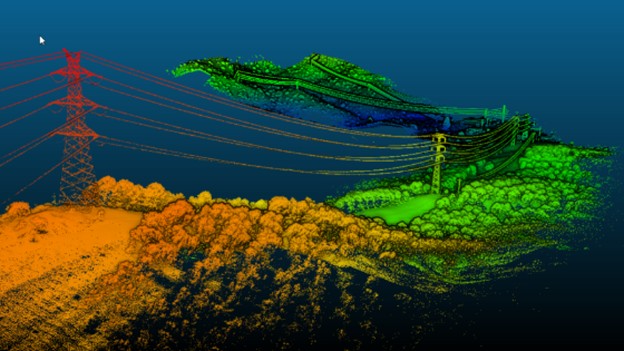
Coordinate systems are not something to “fix later.” When you define them incorrectly at the start, every deliverable, DEMs, hillshades, contours, breaklines, and CAD models, becomes misaligned. That means costly reprocessing and engineering delays.
Research shows that 25 to 30 percent of LiDAR reprocessing fees come from teams failing to lock in datums and projections early.
What You Must Define Before the First Flight
- Horizontal datum
(e.g., NAD83(CSRS), WGS84, provincial standards) - Vertical datum
(e.g., CGVD2013, NAVD88) - Projection
(e.g., UTM Zone, State Plane, or custom engineering grid) - Geoid model
(critical for accurate orthometric elevations) - Height type
Orthometric vs ellipsoidal — this needs to match engineering plans.
What Happens When Datums Are Wrong
When the datum or projection is off, the errors show up everywhere in your data and models. It is not just a “small shift” you can ignore.
You may see horizontal offsets of around 1 to 1.5 metres between LiDAR and existing survey, and vertical mismatches of up to 30 centimetres along roads, structures, and water features. Once that happens, every downstream product starts to drift:
- Contours and hillshades look slightly “off” compared to known ground features.
- Drainage and flood models begin to show false flow paths or ponding in the wrong places.
- CAD files will not tie cleanly into existing survey benchmarks, forcing engineers to either fudge the alignment or send the data back for rework.
In short: if the coordinate framework is wrong, everything built on top of it becomes less trustworthy.
Checklist: Coordinate Prep
Before acquisition, you want everyone working from the same playbook. At a minimum, confirm:
- The horizontal and vertical datums are clearly defined and agreed with all subcontractors.
- The vertical reference matches what your engineering team uses on design drawings.
- A geoid model has been specified and shared with the LiDAR vendor.
Then make it easy to remember. Create a one-page coordinate reference sheet (datum, projection, geoid, units) and circulate it to all stakeholders. Finally, have your vendor send a small sample test tile so your GIS / CAD teams can load it and confirm everything lines up before full processing.
Pro Tips
Keep these in mind as you finalise coordinates:
- Do not assume your GIS team and engineering team are on the same datum, check explicitly.
- For multi-agency projects, ask if your vendor can provide multi-datum deliveries so each group gets data in the system they use.
- Schedule a short coordinate validation call with your vendor before acquisition; a 15-minute conversation here can prevent weeks of reprocessing later.
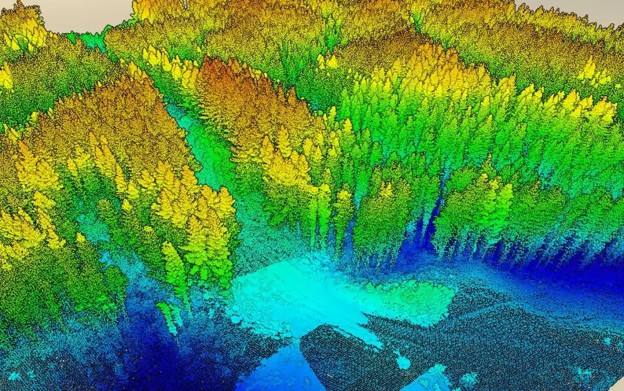
4. Map Out Coverage Area, Point Density, and Accuracy Requirements
Your Specifications Directly Control Flight Altitude, Sensor Choice, and Budget
Before any acquisition begins, your team must define the exact area to be mapped, the accuracy you require, and the point density needed to support your intended analysis.
This is where technical clarity saves thousands of dollars in rework.
Define Your Coverage Area
- Clear project boundary (SHP or GeoJSON)
- Required buffer (most projects need 50–100 metres)
- Any exclusion zones
- Corridor widths for roads, rails, utilities, or pipelines
Point Density Benchmarks
| Use Case | Recommended Density |
| Urban flood modelling | 8–12+ ppm² |
| Utilities & transmission | 30–60 ppm² |
| Transportation corridors | 20–40 ppm² |
| Forestry & biomass | 10–20 ppm² |
| Standard topography | 2–8 ppm² |
Choosing density is a trade-off between accuracy, cost, and processing speed.
Accuracy Targets to Set Early
Engineering-grade projects typically require:
- ≤ 10 cm vertical RMSE
- ≤ 20 cm horizontal error
Utilities, highways, and hydrology models may require even tighter standards.
You should also decide whether the project must meet:
- USGS Quality Level specifications (QL1, QL2)
- ISO- or ASPRS-aligned accuracy protocols
Ground Control Requirements
The more accurate the deliverables, the more essential ground control becomes.
Typical recommendations:
- GCPs every 1–2 km for long corridors
- Checkpoints throughout the AOI
- Accessible benchmarks for engineering integration
6. Build a Realistic Budget and Communication Plan
LiDAR Costs Are Predictable Once You Understand the Drivers
Budgets often balloon because teams fail to align accuracy requirements, density needs, and deliverables before acquisition.
When expectations shift late, re-flights or reprocessing can dramatically increase costs.
Here’s what you should plan for.
Typical LiDAR Cost Ranges in Canada
| Project Type | Cost Range |
| Standard topographic LiDAR (2–8 ppm²) | $200 to $600 per km² |
| High-density urban LiDAR (20–40 ppm²) | $500 to $1,500 per km² |
| Utility or pipeline corridor mapping | $10,000 to $30,000 per 50 km |
| Bathymetric LiDAR | $1,000 to $3,000 per km² |
| Ground control survey | $5,000 to $25,000 |
Terrain, remoteness, and airspace complexity can increase costs by 20–40 percent.
Key Budget Drivers You Must Understand
- Mobilization — one of the largest expenses
- Sensor type — topo vs topo-bathymetric
- Required point density
- Weather windows
- Accuracy standards (e.g., QL1)
- Ground control intensity
- Processing scope (hydrology enforcement, vegetation modelling, noise filtering)
Where Most Teams Overspend
Most teams overspend for the same few reasons: they underspecify deliverables up front, make late-stage changes after acquisition, or request reprocessing such as new DEM resolutions or additional classification levels. Costs also jump when projects lack proper buffers, forcing extra flight lines or partial re-flys to capture missed areas.
Build a Communication Plan Before Launch
Most LiDAR projects run smoothly when communication is consistent and expectations are aligned. Before acquisition, confirm how often you’ll meet for updates, establish clear QA/QC milestones, and set review windows for interim datasets. It also helps to define a simple change-management workflow and assign one centralized contact for each stakeholder group so requests don’t get fragmented or duplicated.
Micro-Checklist: Budget & Communication
- Budget ceiling approved
- All deliverables confirmed
- Acquisition window established
- QA schedule defined
- Vendor reporting frequency set
- Risk mitigation plan prepared
Pro Tips
- If your project is near other active LiDAR projects, ask your vendor whether you can share mobilization, this can cut costs significantly.
- Save money by clarifying exact contour intervals and DEM resolutions early.
- Use one project lead to streamline communication and avoid conflicting requests.
Preparation Is the Difference Between Good Data and Great Decisions
Great LiDAR outputs don’t happen by accident. They’re the result of clear planning, aligned expectations, and a well-structured workflow that starts long before the flight crew arrives on-site. By confirming permits, defining timelines, locking in datums, setting accuracy standards, specifying deliverables, and preparing a realistic budget, your team ensures you receive data that is accurate, dependable, and ready for analysis.
When your LiDAR planning is strong, downstream modelling becomes more precise, engineering decisions move faster, and projects stay on schedule.
Talk to Our Team to Prep Your Project for Success
Preparing a LiDAR project doesn’t have to be complex.
Eagle Mapping supports consultants, municipalities, engineers, and project teams with the planning, permitting, acquisition, and processing expertise needed to launch with confidence.
Talk to our team to prep your project for success
https://eaglemapping.com/contact/